事前準備:xcodeでプロジェクトを作成する
「File」-「New」-「Project」を選択

「Single View Application」を選択

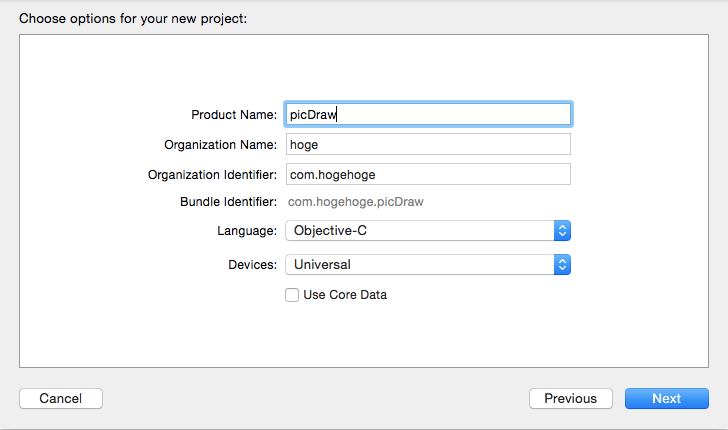
「Project Name」を入力

今回は「picDraw」という名前のアプリを作ります。
「Next」を押すと、プロジェクトを保存する場所を聞かれるので、任意のworkspaceに保存します。
xcodeのメイン画面が開けば準備完了です。

アプリの仕様を簡単に決める
・storyboardでのオブジェクト配置は基本行わない。
他のプロジェクトにコピーする時や、プロジェクト自体を引っ越しさせる時、コピーアプリを作る場合など、オブジェクトの配置などはGUIではなくコードで書いておくとそういった作業が非常にスムーズに行えるため。
・タッチイベントを使って、自由に描き込みができて、メモなどに対応する。
【以後のアップデートで対応予定】
・「消しゴム機能」で、描き込んだ内容を部分的に消せる。
・描いたデータを1枚画像として保存できる。
・保存した画像は、一覧表示して、個別に表示できる。
・画面回転は禁止
描き込んでいる時にorientation動作が入ると描きミスが発生するため。
viewController.hファイルの設定
#import <UIKit/UIKit.h>

@interface ViewController : UIViewController

{
    UIImageView *canvas;
    CGPoint canvasTouch;
}
@end
viewController.mファイルの設定
#import "ViewController.h"

@interface ViewController ()

@end

@implementation ViewController

- (void)viewDidLoad {
    [super viewDidLoad];
    // Do any additional setup after loading the view, typically from a nib.

    //キャンバス用のUIImageViewを作成
    canvas = [[UIImageView alloc]init];
    canvas.frame = self.view.bounds;
    canvas.image = [self getImageNew];
    canvas.layer.borderWidth = 4;
    canvas.layer.borderColor = [[UIColor redColor]CGColor];
    [self.view addSubview:canvas];


}

- (void)didReceiveMemoryWarning {
    [super didReceiveMemoryWarning];
    // Dispose of any resources that can be recreated.
}

//空白画像の作成
-(UIImage *)getImageNew{
    UIImage *img = [[UIImage alloc]init];
    UIGraphicsBeginImageContext(CGSizeMake(self.view.frame.size.width, self.view.frame.size.height));
    img = UIGraphicsGetImageFromCurrentImageContext();
    UIGraphicsEndImageContext();
    return img;
}

/**
 * Touchイベント操作
 */
//Touch開始処理
-(void)touchesBegan:(NSSet *)touches withEvent:(UIEvent *)event{

    //対象のキャンバスを選択
    UITouch *touch = [touches anyObject];
    canvasTouch  = [touch locationInView:canvas];

}
//Touch動作
-(void)touchesMoved:(NSSet *)touches withEvent:(UIEvent *)event{

    //描画処理
    [self touch2draw:touches];

}
//Touch終了
-(void)touchesEnded:(NSSet *)touches withEvent:(UIEvent *)event{

}
//Touchキャンセル
- (void)touchesCancelled:(NSSet *)touches withEvent:(UIEvent *)event{
    //NSLog(@"touchCancel");
}

/**
 * 描画処理
 */

//描き込み
-(void)touch2draw:(NSSet *)touches{

    //初期設定
    float scale = 1.0f;
    float penSize = 20.0f;

    // 現在のタッチ座標をローカル変数currentPointに保持
    UITouch *touch = [touches anyObject];
    CGPoint currentPoint = [touch locationInView:canvas];

    // 描画領域をcanvasの大きさで生成
    UIGraphicsBeginImageContext(canvas.image.size);

    //キャンバス座標
    float x = 0;
    float y = 0;
    float w = canvas.image.size.width;
    float h = canvas.image.size.height;

    // canvasにセットされている画像(UIImage)を描画
    [canvas.image drawInRect:CGRectMake(x,y,w,h)];

    // 線の角を丸くする
    CGContextSetLineCap(UIGraphicsGetCurrentContext(), kCGLineCapRound);

    // 線の太さを指定
    CGContextSetLineWidth(UIGraphicsGetCurrentContext(), penSize);

    // 線の色を指定(RGB)
    CGContextSetRGBStrokeColor(UIGraphicsGetCurrentContext(), 1.0, 0.0, 0.0, 1.0);

    // 線の描画開始座標をセット
    CGContextMoveToPoint(UIGraphicsGetCurrentContext(), canvasTouch.x*scale, canvasTouch.y*scale);

    // 線の描画終了座標をセット
    CGContextAddLineToPoint(UIGraphicsGetCurrentContext(), currentPoint.x*scale, currentPoint.y*scale);

    // 描画の開始~終了座標まで線を引く
    CGContextStrokePath(UIGraphicsGetCurrentContext());

    // 描画領域を画像(UIImage)としてcanvasにセット
    canvas.image = UIGraphicsGetImageFromCurrentImageContext();

    // 描画領域のクリア
    UIGraphicsEndImageContext();

    // 現在のタッチ座標を次の開始座標にセット
    canvasTouch = currentPoint;
}

@end
ビルド

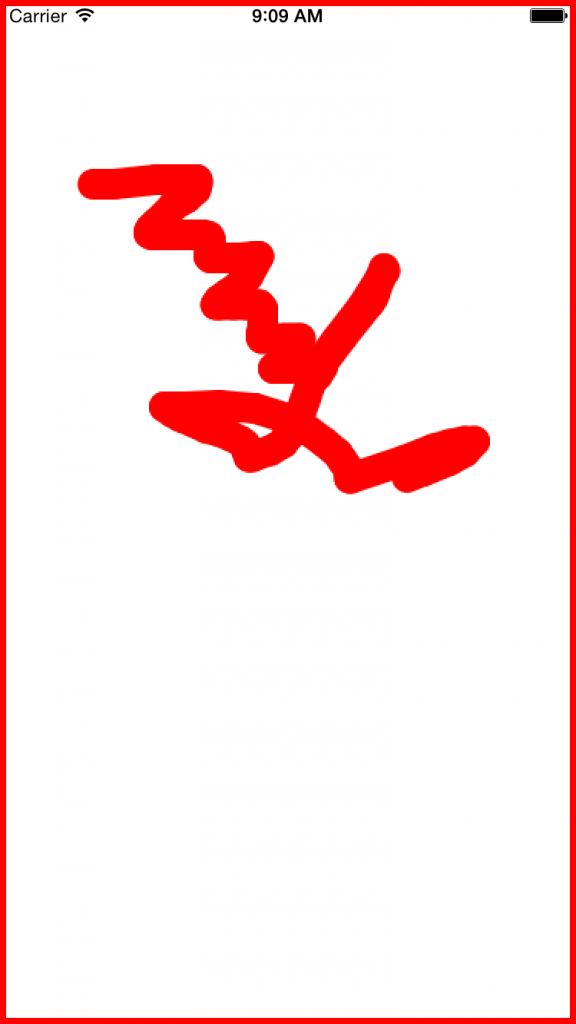
無事に書き込みができるようになったんで、今回のバージョンは完成です。
実機への組み込みは、有料のDeveloppersProgramに登録しておく必要があるので、以後の回で説明します。


 今回は「picDraw」という名前のアプリを作ります。
「Next」を押すと、プロジェクトを保存する場所を聞かれるので、任意のworkspaceに保存します。
xcodeのメイン画面が開けば準備完了です。

 無事に書き込みができるようになったんで、今回のバージョンは完成です。
実機への組み込みは、有料のDeveloppersProgramに登録しておく必要があるので、以後の回で説明します。
0 件のコメント:
コメントを投稿